By understanding the number of RAM slots available on the motherboard, you can quickly determine whether you can add more RAM sticks or purchase a new motherboard. Although you can open your computer case or check your documentation to verify the total RAM slots, you can also confirm the total number of slots supported on your motherboard via Task Manager. So, in this article, we are going to share a working method that would help you to check the RAM Slots available on your motherboard. To check the RAM Slots, users need to use the default Task Manager of Windows 10.
Check Used & Empty RAM Slots on Windows 10
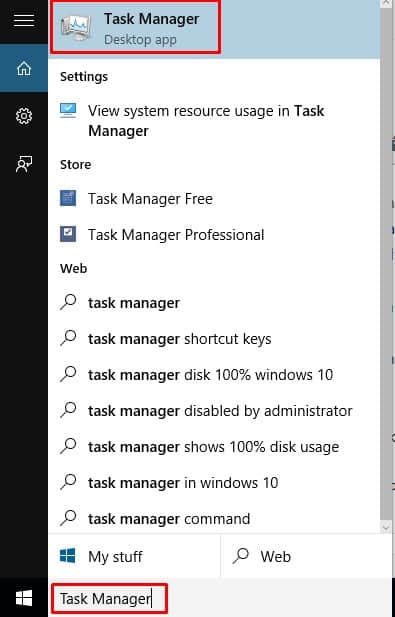
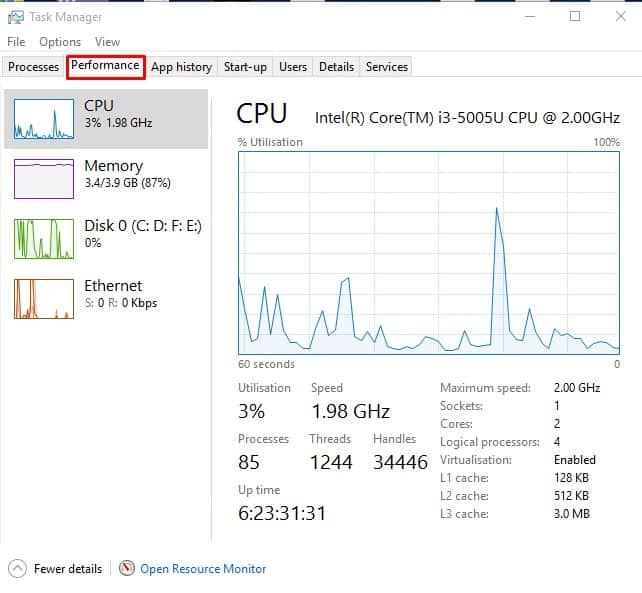
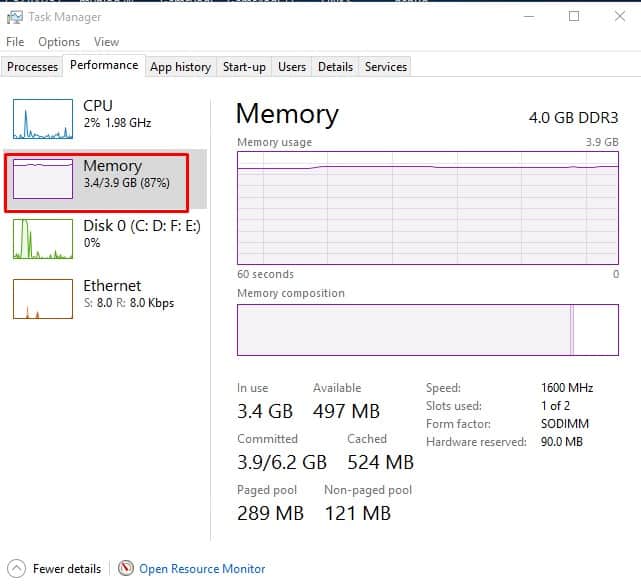
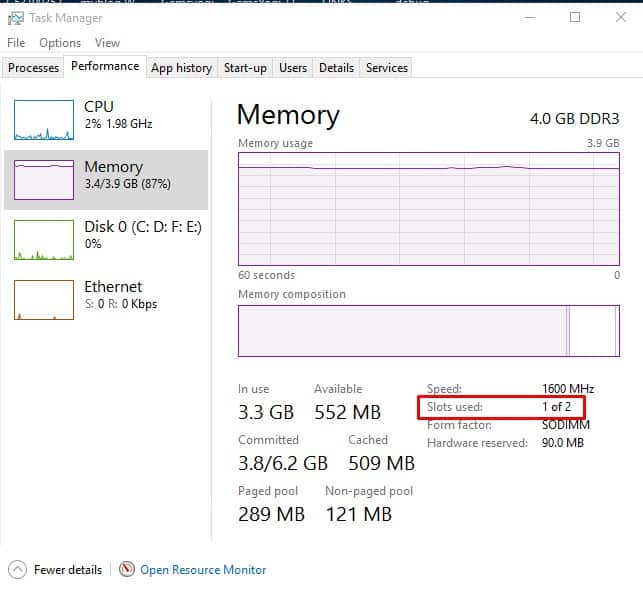
It’s worth noting that there are plenty of third-party tools available to check the RAM slots, but most of those software contains malware that can damage your system files. So, let’s check the steps to quickly find out if your PC has any available memory slots left. Step 1. First of all, open the Start Menu and search for Task Manager. Step 2. Open Task Manager from the List. You can also open Task Manager By Pressing CTRL + ALT + Delete. Step 3. Now on the Task Manager, you need to move to the ‘Performance’ tab. Step 4. Now under the Performance tab, select ‘Memory’ Step 5. Now on the right-hand side panel, check the ‘Slots Used’. On my computer, its showing 1/2. That means I can add an extra memory stick. That’s it, you are done! This is how you can quickly determine memory slots available on the Motherboard on Windows 10. So, this article is all about how to check used and empty RAM slots on Windows 10 computers. I hope this article helped you! Share it with your friends also.


